Creating and configuring backup policies
The Azure Backup service is used to back up resources and data in Azure. This can be used for cloud-only or hybrid scenarios, where you want to back up your on-premises VMs to Azure. Your on-premises backup solution can also be extended to the cloud in conjunction with Azure Backup. Azure Backup is capable of creating backups for VMs, files, folders, applications, workloads, system states, and volumes. Azure Backup consists of the following features and capabilities:
- Back up on-premises resources to Azure: Azure Backup offers short and long-term backup solutions. This can be a replacement for tape and off-site backups.
- Back up Azure VMs: Azure Backup offers independent and isolated backups. These backups are stored in a Recovery Services vault. This vault has built-in management for recovery points.
- Automatic scaling: You can get unlimited scale without maintenance overheads. Alerts can be set for delivering information about events.
- Unlimited data transfer: There is no limit to the amount of inbound and outbound traffic that can be transferred during the backup process. However, if you use the Azure import/export service to import large amounts of data, then a cost will be associated with inbound data.
- Data encryption: Data can be encrypted using an encryption passphrase. This is stored locally and is then needed to restore the data.
- Short and long-term retention: Recovery Services is where the backups are stored and provides short and long-term backups. Azure doesn’t limit the time or length that data can be stored in a Recovery Services vault.
- Multiple storage options: Azure Backup offers two types of replication – locally redundant storage (LRS), where your data is replicated three times by creating three copies of the data within the same region, and geo-redundant storage (GRS), which is the default option, where the data is replicated to a secondary region.
You need to answer two questions when configuring a backup:
- Where is the workload running?
- Is the workload running in Azure or somewhere else?
- What do you want to back up?
- VMs, files and folders, SharePoint, Exchange, Hyper-V VMs, and so on.
Microsoft has added a new experience for administrators to create and manage backups called Backup center. With Backup center, you can view Recovery Service vaults, backup instances, and backup policies.
Now that we understand how Azure Backup works fundamentally, it is time to enroll a VM into Azure Backup and create a backup policy. Let’s configure a backup policy for an Azure virtual machine that has been deployed to the same resource group (Az-104):
- Navigate to the Azure portal by opening a web browser and going to https:// portal.azure.com.
- Browse to the relevant resource group (in the preceding section, I used Az-104) and select the Recovery Services vault (Az104RecoveryServicesVault):
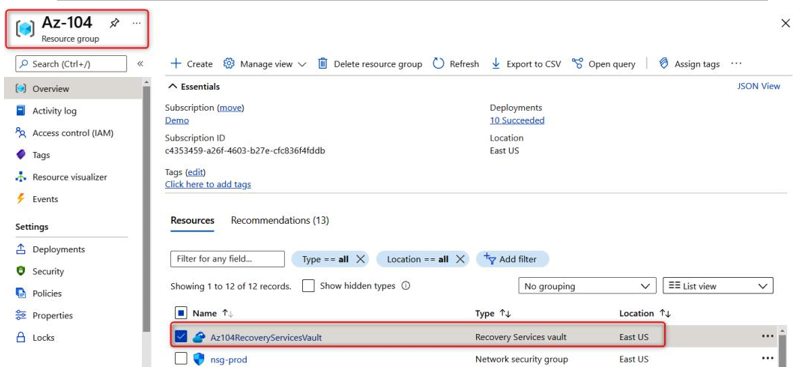
Figure 21.4 – Selecting the Recovery Services vault within the Azure portal
- Next, select the Backup option:
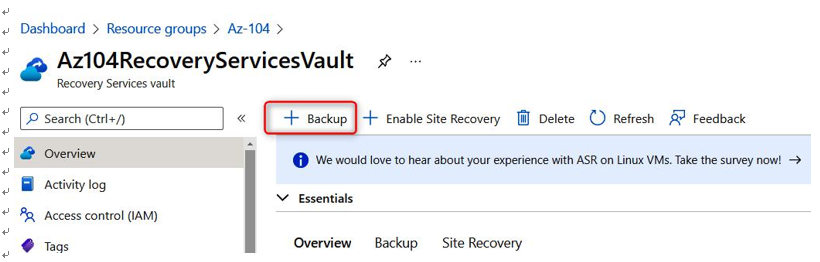
Figure 21.5 – Configuring Azure Backup
- Next, select Azure as the workload type and choose Virtual Machine. Then, select Backup:
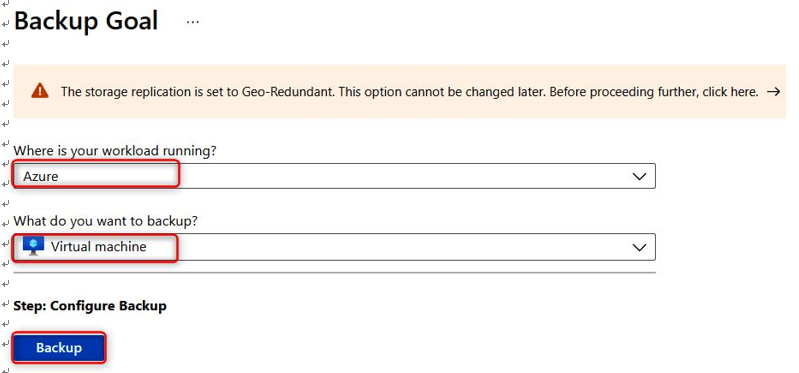
Figure 21.6 – Selecting Azure Backup workloads
- Instead of using the default backup policy, choose to create a new policy and provide the following details:
- Policy name: AzureVMBackup
- Backup schedule: Daily
- Time: 8:00 A.M.
- Timezone: (UTC) Coordinated Universal Time
- Instant Restore: 2 days
- Retention range: 30 days
- Leave the rest of the settings as Not Configured:
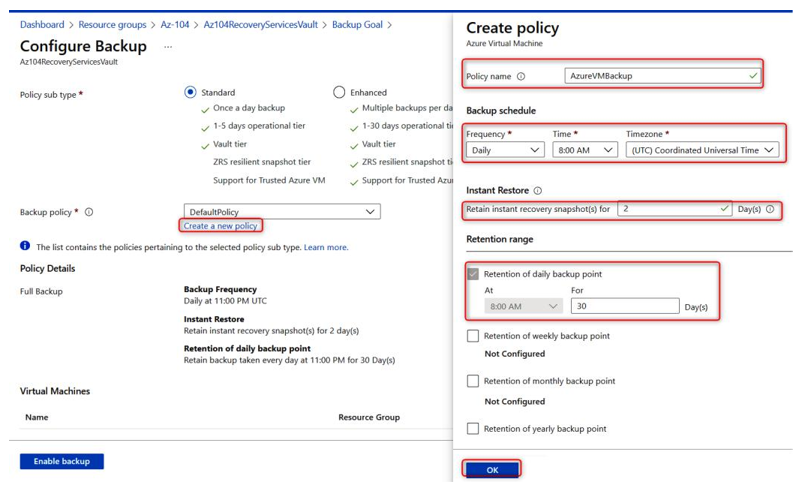
Figure 21.7 – Backup policy configuration
- Under Virtual Machines, click on Add and select a virtual machine:
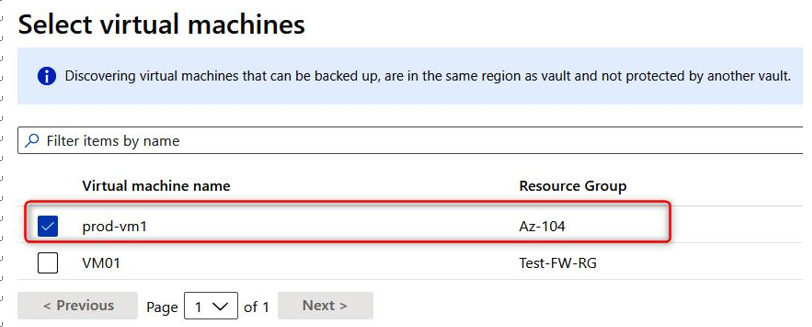
Figure 21.8 – Selecting the VM related to the backup policy
- Click on Enable Backup.
- Once you’re done, you will see that the VM has been enrolled in Azure Backup. After a while, the backup policy will trigger:
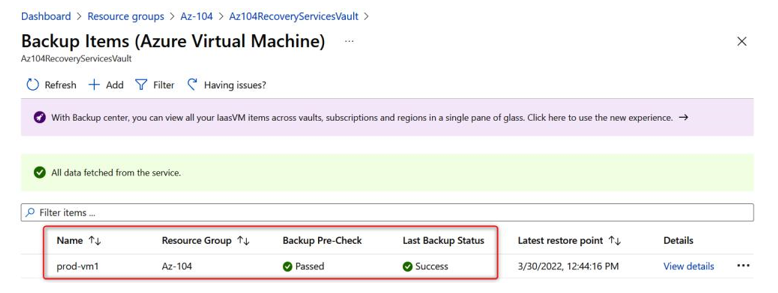
Figure 21.9 – Virtual machine successfully enrolled in Azure Backup
With that, we have successfully created an Azure Backup policy for virtual machines that will run daily and create a backup of the VM.